

The soil is the most important part of the garden. Without it, there are no plants.
The soil can help plants flourish and can also lead to their death. For this reason, knowing every soil information that leads to a healthy plant is crucial. And knowing soil pH is a vital part of treating your soil.
While some plants prefer alkaline soil, others love acidic soil. So, how do you perform soil pH tests right from home without all the technicalities? That’s what we will be sharing in this article. Let’s get right on it.
Table of Contents
When to Test Soil pH
You should test your soil pH to know if it’s too high or too low. You don’t want to start seeing the impact on your plants before knowing what to do.
So, it is important to test your soil pH before planting new crops or prior to growing a new plant variety with a specific need. When you test the soil and your plants start developing a problem, it will be difficult to tell the cause is from the pH.
According to experts, gardeners should test their soil pH every few years, especially when they have needed to amend the soil in the past.
The materials used to adjust soil pH, such as elemental sulfur (used to lower soil pH) or lime (used to raise soil pH), break down over time and might need to be reapplied to keep the pH level at optimal levels.
Materials Required
- Measuring cup
- Spoon
- Equipment / Tools
- 2 small containers
- Test Strip
- Trowel
- Vinegar and Baking Soda
- 1 cup distilled water
- 1/2 cup white vinegar
- 1/2 cup baking soda
Soil pH Test With Baking Soda, Vinegar, and Cucumber
To test your soil pH at home, get some scoop of the soil from the planting area into a clean container using a trowel.
Ensure to take the soil from some inch below the ground surface. Break up clumpy soil and remove rocks, sticks, and other debris.
To get the best result, mix the soil samples. For instance, if you’re planting a single garden bed, take a few samples from that area and mix them. But if you are planting in an entire lawn, mix samples from different yard areas before testing.
The reason is that testing a blended soil will provide more accurate results as a single garden spot might be typical of the rest of the soil.
Testing for Alkalinity
Add ½ cup of distilled water to one soil container and mix it with a spoon to test for alkalinity. Add 1⁄2 cup of white vinegar to the mixture. The soil has an alkaline pH if the soil shows visible bubbling signs or fizzing action. The more the fizzing action, the higher the soil alkalinity.
The chemical reaction results when the acidic vinegar mixes with an alkaline substance in the soil.
| Method | Materials Needed | Steps | Pros | Cons |
|---|---|---|---|---|
| Litmus Paper | – Litmus paper (pH strips) | 1. Collect soil sample. | – Inexpensive and easy to use. | – Less precise than other methods. |
| – Distilled water | 2. Mix soil with distilled water. | – Quick results. | – Limited pH range. | |
| – Soil sample | 3. Dip litmus paper into the mixture. | – No need for special equipment. | – Not suitable for highly acidic/alkaline soils. | |
| – Plastic containers | 4. Compare color change to pH chart. | – Good for basic pH estimation. | ||
| – pH color chart | 5. Record the pH value. | – Suitable for educational purposes. | ||
| pH Testing Kit | – Soil pH testing kit | 1. Collect soil sample. | – Provides more accurate results. | – Requires purchasing a kit. |
| – Distilled water | 2. Mix soil with distilled water. | – Suitable for a wide pH range. | – May be more time-consuming. | |
| – Plastic containers | 3. Follow kit instructions for testing. | – Often includes additional soil nutrient information. | – Initial cost for the kit. | |
| Digital pH Meter | – Digital pH meter | 1. Collect soil samples. | – Highly accurate results. | – Requires calibration and maintenance. |
| – Distilled water | 2. Mix soil with distilled water. | – Suitable for professional use. | – More expensive initial investment. | |
| – Plastic containers | 3. Insert the meter probe into the mixture. | – Quick and precise measurements. | – Delicate and can break easily. | |
| – Calibration solutions | 4. Record the pH reading. | – Can be used for repeated testing. | – Requires proper storage and care. |
Testing for Acidity
Add ½ of distilled water to the other container and mix it up. Add half a cup of baking soda to the mixture. If the soil bubbles or fizzles, it’s acidic.
The reaction is a result of the acidic soil mixing with the alkaline nature of the baking soda. The more the fizzle or bubbles, the more acidic the soil.

Testing for Acidity with Red Cabbage Water
You can also check for soil acidity using red cabbage water. Measure 2 cups of distilled water into a saucepan. Cut and add four to six red cabbage leaves to simmer for 10 minutes. Remove from heat and allow to sit for 30 minutes.
Strain out the purple/blue liquid and add 2 teaspoons of garden soil to a jar and a few inches of cabbage water. Stir and wait for 20 to 30 minutes.
Check the color. If it turns reddish pink, the soil is acidic. Sea blue/yellow-green color indicates your soil is alkaline. Neutral soil is usually purple/blue.
Ensure not to add too much soil to each jar, as it can cause the cabbage juice to turn greyish-black, which can cause you to redo the test.
Soil Amendments
When your soil test reveals that it is too alkaline or acidic, you must enact an amendment to rectify it.
For this process, you need agriculture lime. Agriculture lime is commonly used to help raise soil pH. However, you can use wood ash too. Pine needles and elemental sulfur are traditional amendments used to lower soil pH and make it more acidic.
Gauging how much amendment your soil requires is difficult. Start by amending small soil areas, then repeat the soil pH test at home to determine where you are.
However, the best way to lower the pH of your soil fast is to use laboratory tests to determine the exact type and quality of amendment required. Here is how to do soil amendments using test strips.
Required Materials
- Test Strip
- Distilled water
- Coffee filter
- Soil pH test strip
Instructions
- Get Sample
Collect soil samples from the planting area using a trowel. Take a blend from different parts of the planting area and dig a few inches below the soil line.
Take about half a cup of soil and place it in a container. Break up clumps and take out stones and debris.
- Add Distilled Water
Pour distilled water into your container up to the same level as the soil. Stir the mixture and let it sit for about 30 minutes.
- Drain the Sample
Strain the soil sample using a coffee filter and into another clean container. Ensure you get the solid components.
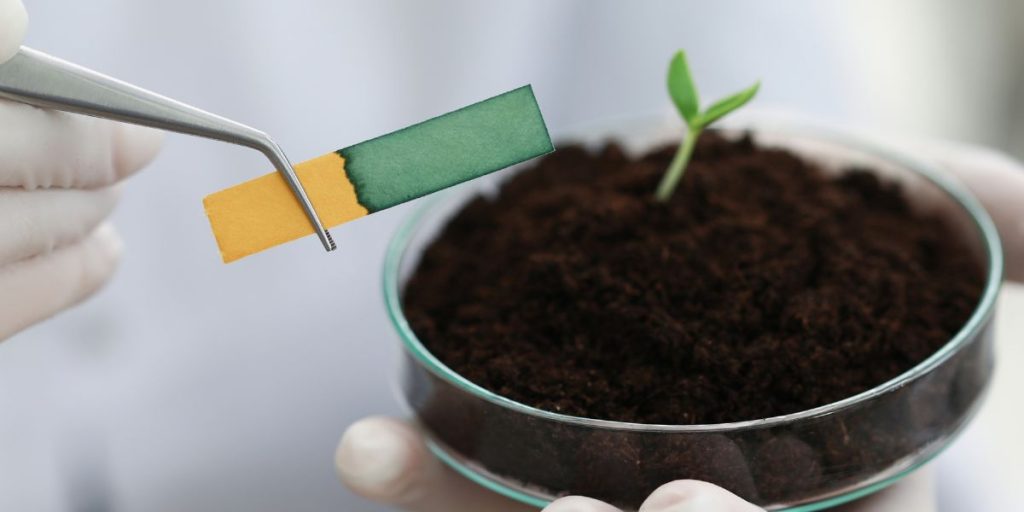
- Use the pH Test Strip
Dip the soil pH test strip into the liquid following the test strip instructions as to how long you should leave it. When the strip turns color, compare the color to the chart on the test strip packaging to determine the pH.
Frequently Asked Questions [FAQs]
1. Can You Test Soil PH With Vinegar?
Yes, you can test soil pH with vinegar. All you need to do is scoop some soil into a container and add ½ cup of vinegar. If the soil bubbles, it’s alkaline.
2. How Do You Test PH In Potting Soil?
Getting a blended soil sample from different parts of the planting area is simple. Pour distilled water into the container up to the same level as the soil and drain the sample. After that, use the pH test strip to detect the soil pH.
3. What Happens When Soil PH Is Too High?
A high pH can pose many problems for your plant’s health and growth. For most plants, soil with high alkalinity deters its ability to absorb nutrients, thus limiting its optimum growth.
4. Which Plants Do Not Like Acidic Soil?
Most ornamental clovers do not like acidic soil—the same with those in the legume family. Ornamental clovers like Trifolium Rubens and Trifolium are star performers on chalky soil.
Wrap Up!
Knowing how to test soil pH is important for proper plant growth. The plant’s ability to absorb nutrients depends on the nature of the soil, and the soil makeup and acidity determine the nutrients that will be made available to the plant.